It's always a good idea to constantly load test your application so you can spot a regression in performance. That's easier said than done some times: load testing used to require specialized tools and vendors. When I was in the partner space, one of our customers used to load test their solution on every major release to the tune of $20,000 a pop.
Fortunately, a colleague pointed me to Locust during one of our projects. Locust is a lightweight, Python-based tool for putting load on your application. A few things that immediately drew me to it:
- Locust is very lightweight, and could be run from practically anywhere with a Python runtime. This allowed us to have developers run tests while developing locally, which helped us to catch regressions earlier, and test new functionality performance pre-commit.
- Locust scripts are easy to read and write Python scripts. Developers could pretty quickly exercise any site or API endpoint without going through a large process to set up URLs.
Locust doesn't do code profiling, or true end-to-end performance metrics. But it does exactly as it says on the tin, and it does it well with minimal overhead.
It had been a few years since I'd used it, so when I started poking around to see if it could help a customer I'd been working with, I was really excited to see that you could do some very powerful testing by paring it with Docker.
Just a quick note: I've posted all of the files I reference below on GitHub here. If you're looking to get started quickly, you can grab those files and change the scripts as you read on!
Getting Started with Docker and Containers
You'll start off by installing Docker. Docker enables and manages the running of virtual machines in containers. This allows for rapid provisioning/de-provisioning with lightweight Linux containers that can run on any modern OS.
First, we need to get an image from Docker Hub with Locust installed. This article by Scott Ernst served as most of the inspiration for this post, as he had already done the legwork of writing up the process and creating the base containers. I'll sum up the process I used after reading his post, but his writeup is also a great read.
From an admin Powershell prompt ( I assume you're testing from a Windows host if you're a Sitecore developer. If you're not, you're smart enough to figure out what type of terminal you need open :) )
docker pull swernst/locusts:latest
This will grab the latest version of the container from Docker Hub to your local machine. This docker image can create both master and slave instances of Locust to perform tests. The master instance hosts a web interface as well as co-ordinates with slave instances. The slave instances actually perform the tests, and report statistics back to the master instance for reporting and aggregation. The split allows you to scale the number of slave instances to do really large load tests, as well as deploy the docker instances across multiple geographic locations or cloud providers.
In order to make spinning these instances up easier, we'll create a docker-compose.yml file to do the heavy lifting for us:
version: "3"
services:
  locust-master:
    image: swernst/locusts
    volumes:
      - ./scripts:/scripts
    ports:
      - "8089:8089"
  locust-worker:
    image: swernst/locusts
    command: "--master-host=locust-master"
    volumes:
      - ./scripts:/scripts
Breaking the compose file down:
- We're creating two classes of machines from this compose file: locust-master and locust-worker.
- They're both using the swernst/locusts image we just pulled down from Docker Hub.
- They're both tying the /scripts directory in the container to a subdirectory on our host machine with the same name. This will allow us to drop the scripts we want to use for this test in that folder, and make them available to all our instances.
- The locust-master instance has a port defined. This is mapping port 8089 on our host machine to 8089 in our container. That's going to allow us to hit the web interface on the master instance.
- The locust-worker instance is taking an additional command parameter that tells it to connect to the master instance for orchestration.
I'm not putting a significant load on the instance I'm testing, so I only need one master instance and one worker instance. I can start that up by running the following command in the directory with my docker-compose.yml file:
docker-compose up
If I wanted to spin up 3 worker instances, I could do that by running:
docker-compose up --scale locust-worker=3
When I'm done running my tests, I can just press Control-C in the Powershell window, and Docker will spin down all the machines gracefully. These processes take almost no time (4-5 seconds total), so it's easy to spin up and down instances when needed.
Writing Locust Scripts
Locust uses two files when running a test:
- locust.config.json, to defines what TaskSets will be run against what server, and
- locustfile.py, which contains the test scripts themselves.
Let's take a look at the locustfile first:
from locust import HttpLocust, TaskSet, task

class BasicTaskSet(TaskSet):

    @task(3)
    def root(self):
        self.client.get('/')

    @task(2)
    def about(self):
    	self.client.get('/en/About-Habitat/Introduction')

    @task(1)
    def projectmodules(self):
    	self.client.get('/en/Modules/Project')

class BasicTasks(HttpLocust):
    task_set = BasicTaskSet
    min_wait = 5000
    max_wait = 10000
Locust scripts can be incredibly powerful, and include branching logic, authentication, POSTing to API endpoints, HTML parsing, and more. The documentation is good and can help you set up more complex scenarios, but let's take a look at this simple example. Our BasicTaskSet defines 3 tasks for us to run, all of which are loading a specific page in our solution. By using the @task() designator, we can specify how our traffic will be divided. In the code above, for every 6 visits, 3 visitors will go to our first task, 2 to the second task, and 1 to the third.
Our BasicTasks class also defines a min_wait and max_wait parameter. These are used to simulate random times (in our instance, between 5 and 10 seconds) to wait before performing the next task. You can use this to provide a more realistic load, simulating users reading your content before continuing on.
Let's take a look at our locust.config.json file:
{
  "target": "http://habitat.demo.sitecore.net",
  "locusts": ["BasicTasks"]
}
This is pretty self explanatory -- we're specifying our root URL in the target parameter, and what tasks to run in the locusts parameter. You could use these values to change between environments and sites easily without modifying your underlying test scripts.
Let's Get Swarmin'!
At this point, we should have the following directory structure, and our instances should be running via docker-compose up:
hello_load_test/
    docker-compose.yml
    scripts/
        locustfile.py
        locust.config.json
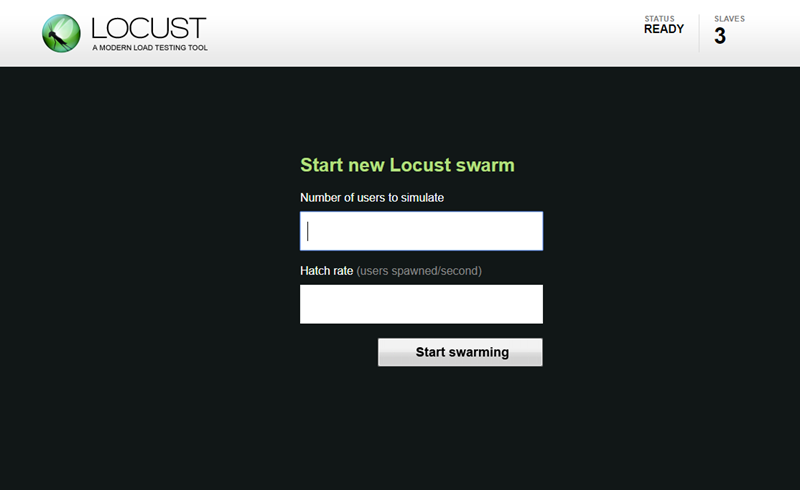
Let's pull up the Locust web interface by visiting http://localhost:8089, and you should be presented with this screen:

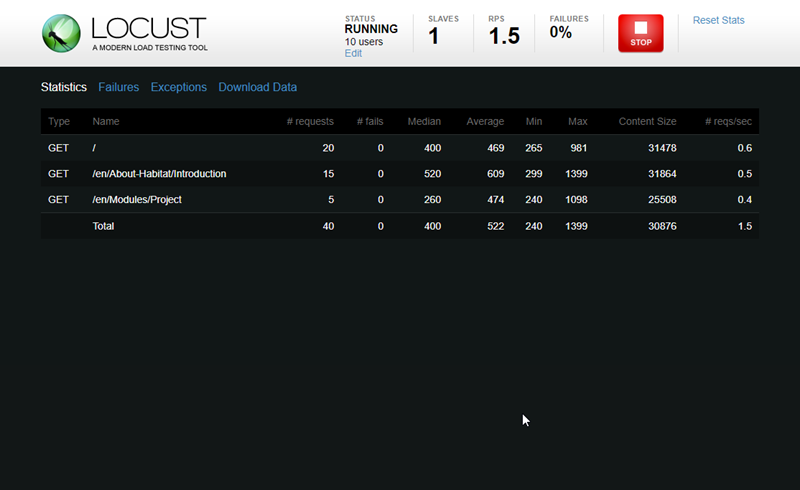
You'll determine the total number of users to simulate, and what the hatch rate is. Hatch rate will slowly ramp up the number of users in the pool until all users are online and testing. Once you hit "Start Swarming", you'll start seeing the result of the traffic:

For each page, you'll be able to see the median, min and max response time (in milliseconds), the number of requests the page is seeing a second, and any number of failed requests to the page. Any exceptions or failure messages will be logged and can be viewed in the tabs at the top of the page.
When you're done testing, hit the stop button at the top of the page. You'll then be able to download CSV's of the statistics and any errors that occurred. Remember to also shut down your containers by hitting Control-C in the Powershell window.
That's Great ... Now What?
As nice as it is to have numbers, my primary usage of Locust is to do experience testing. While the load is on the server, I'm usually browsing the site in another browser or on my phone to see what the experience of the site is like for a visitor or content author. The numbers will be helpful in determining how much load your server can take, but testing what your visitor's experience will be like under that load is equally important.
Other great uses for this type of testing?
- You'll be able to identify what pages or endpoints are poor performing. While this won't lead you to individual components, content items, or renderings, it can point you towards items that need additional review with the Sitecore Debug view in Experience Editor, for example.
- During development, it's very easy to spin up a few containers and put some realistic load on the application to validate your code and approach. You'll be able to catch some issues before you make a commit!
- If you're running a CI pipeline, you could use your build toolchain to run tests against an integration environment, and report any regressions immediately back to your team. Catch performance issues before they get to production!
- Since Azure and AWS now support running docker containers, you could use these instances to push worker images to different geographic locations to do more real-world tests.
That last bullet is where I'm hoping to go next -- I'll post any updates to my progress when I can.
